Written by Andrew Grandstaff
Logos is a very consistent house. I think there are a lot more B’s in this house than Dis and Brobnar but there aren’t any cards that are just amazing by themselves. The themes in Logos are card draw, archiving, the top of your deck, symmetry, and some changing battle line positioning. A lot of Logos power seems to be in its commons and uncommons so the house itself should perform consistently above average for most decks that have it.
| Top 5 Commons | Top 5 Rares |
| Mother: B | Neutron Shark: B- |
| Twin Bolt Emission: B | Vespilon Theorist: B-/B |
| Quixo the “Adventurer”: B | The Howling Pit: B |
| Library of Babble: B+ | Mobius Scroll: B |
| Library Access: B/B+ | Timetraveller: B/B+ |
Grading Rubric
All of these cards are graded in a vacuum. I firmly believe every card can be good in the right situation, but the goal here is to try and figure out how good the card is on average. Without knowing anything about the rest of my deck and my opponent’s deck what is the expected value of this card.
A: Almost always provides an overwhelming amount of some resource and is generally difficult to remove or counter.
B: Almost always generates 2 aember or 2 cards or some combination of the two. Creatures and artifacts get a bonus based on how immediate of a threat they are.
C: Almost always generates 1 aember or 1 card. Creatures and artifacts get a bonus based on how immediate of a threat they are.
D: Cards that you are more likely to discard than play and gain you no aember.
F: Cards that are a trap and if you play are more likely to hurt you than help you.
Pluses and minuses are generally awarded for consistency or to acknowledge a powerful effect that will be relevant about half the time the card is played.
X//Y Grades: X is the grade of the card in a random deck Y is the grade in a deck it heavily synergizes with.
Bouncing Deathquark: C+/B-

- While it doesn’t offer any card advantage or aember it does let you trade you bad or play effect creatures for creatures that have elusive and are protected by taunt. You also get to reap with your creatures before trading.
Dimension Door: C

- This card asks a lot to give little advantage. It doesn’t give you extra aember and it limits you to how much your opponent has. I would want to have at least 3 sources of aember before this card starts entertaining the B range.
Effervescent Principle: F+

- There are so few times when this card gives enough of an advantage to make up for the chain that you will probably end up discarding it every time it’s in your hand. From the data I have collected it causes the active player to lose 1 less aember than their opponent on average.
Foggify: C

- There is a card in Magic called Fog that prevents all combat damage. It is bad. At least in KeyForge, they are giving it some value with the aember. Generally, you should want to reap instead of fighting so this card shouldn’t affect too much of what your opponent is going to do, but it might buy your utility creatures an extra turn.
Help from Future Self: C-//B+/A-

- I assume this card will never appear in a deck without the currently only one Timetraveller. If they are both in the same deck this card reads draw 2 cards gain 2 aember and a 2 power creature. While it doesn’t have the consistent effects of the other A’s I’ve given, this is far above my qualifications for a B. If there is no Timetraveller in your deck then C- is my standard card that gives 1 aember and nothing else.
Interdimensional Graft: C-

- There are only 2 turns in the game where this card is anything more than gain 1 aember. There is also no guarantee that on those turns it will actually do anything as well.
Knowledge is Power: C+/B-

- I feel like it’s not unlikely in logos to have at least 2 cards archived and the other option to archive a card is at least a reasonable effect to fall back on.
Labwork: B

- 1 card and 1 aember that’s a B.
Library Access: B/B+

- In a 2/2/2 hand this is maybe a C+ but there are some big payoffs when you get to +3 Logos cards in hand and has good synergy with a couple other logos cards like Wild Wormhole and Phase Shift.
Neuro Syphon: B-

- Not too much to say about this card. If you get the full effect then this card is great. If not then at least it’s not a completely dead card
Phase Shift: C/C+

- It’s kinda like card advantage in that you get an extra card out of your hand that you normally wouldn’t have. That and access to effects outside of logos gives this card a lot of versatility.
Positron Bolt: B/B+

- I expect the base case to be at the B level. It should always get 1 creature and earn 1 aember. Most people stack their smaller creatures on the inside so the decreasing damage has a chance to score an extra kill.
Random Access Archives: C+

- This only card draws if you ever decide to pick up your archive. I would also prefer more control over what goes in. If your archive is full of narrow answers and this sticks an all around good card in there it probably won’t be worth it to pick up your archive. Also, this is not how random access memory R.A.M works
Remote Access: C/C+

- Has the potential for a lot of value, but sometimes your opponent is on Mars and has their Mars matters artifacts out.
Reverse Time: C-//A

- Turn one this turn 2 Arise! Sounds almost unbeatable. This is definitely a combo piece. Aside from the crazy combos, this effect isn’t very strong and the only real value is the aember.
Scrambler Storm: C+/B-

- This might be more match-up dependent, but the text box is strong enough that it’s worth more than just the aember. It seems most decks are on a close to 50/50 creatures and actions that this should stop at least 1 from being played every time.
Sloppy Labwork: B

- Better than normal Labwork due to the extra card and the same aember gain. Not quite worth the upgrade to B+ but close. Side note: You discarding a card on your turn will refill your hand to the normal size, but your opponent forcing you to discard means you play your next turn down a card. This is my logic on why Sloppy Labwork’s discard is good and if you’re the target of Mind Barb then discard is bad.
Twin Bolt Emission: B

- Very likely to pick off a small creature and if you’ll be lucky if you can get a second.
Wild Wormhole: B

- Very good chance your next card is worth something and could get a card outside your active house which I consider extra value. You should generally make this your first play of the turn as it will give you more information on how you will want to sequence the rest of your plays.
Anomaly Exploiter: B/B+

- Let’s you trade any of your Logos creatures for theirs. Really strong with skirmish or direct damage. Might get a plus against Brobnar considering their affinity for having damaged creatures.
Chaos Portal: C

- There is too much variance in this card. You have a 1/3 chance of getting it right and you can only activate it on a 1/3 of your turns. You won’t have enough time in an average game to get much value out of this.
Crazy Killing Machine: C+/B-

- This card really depends on how many houses you share with your opponent. The greater the better chance you have to destroy two of their things.
Library of Babble: B+

- Sometimes you’ll get lucky and hit another card you can play the other times its extra information for your next turn.
Mobius Scroll: B

- Most decks I’ve seen contain several narrow cards and this if you’re lucky can get two of them out of your hand for later. You may even just want to use it A.S.A.P. and archive 2 cards of the same house and set up for a big turn later.
Pocket Universe: C-
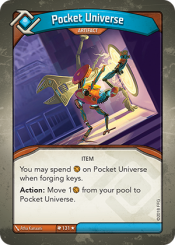
- This is going to make sure you can forge your last key except against decks that try to slow you down by increasing the cost. You have to get this out early to make the most out of it. If you can get +4 on there then it might be worth a card.
Spangler Box: C/C+

- Is a solid C+ against a non Logos opponent because if they want to take their whole turn to remove one of your creatures it’s probably worth it. While this card is only a 1 for 1 it does get their best creature and if they activate it you got to take advantage of it first which is enough of a break in the symmetry that I think this is a solid card.
Spectral Tunneler: B-/B

- There are a couple of creatures that gain an advantage while on a flank and a few more that have a symmetrical effect so this could be used to break it. Titan Mechanic comes to mind.
Strange Gizmo: D-

- This feels like a high variance card that your opponent has a reasonable amount of control over. They ultimately have the last say of when it activates. It can be great when you’re behind but is by far the worst board wipe I’ve seen.
The Howling Pit: B

- Probably another Magic card reference, this one to Howling Mine. Both cards draw each player 1 extra card every turn and Keyforge’s The Howling Pit is better because you get the extra card first. If there ever is a multiplayer format this is a great card to gain political favor.
Batdrone: C+

- This is a must kill creature thanks to Skirmish and a strong fight ability. It might not always be able to pick off a creature but it should enable a favorable trade. I really want to give it a higher grade but it’s just too fragile that it shouldn’t live long enough to make a huge impact.
Brain Eater: B/B+

- It’s a big enough creature that your opponent is going to have a hard time dealing with it in a way that doesn’t trigger its ability. Play this card any turn of the game and reap with it until your opponent plays a threat that needs answering. Make them waste their actions fighting and giving you cards.
Dextre: D+

- Every part of this creature is bad, play capture 1 bad, 3 power body vanilla bad, destroy put on top of deck bad. Why would I want to see this guy again? The only use for this guy is synergies with cards that care about the top of your deck.
Doc Bookton: B

- Has everything I like in a creature. A good sized body and a good reap ability. Might be undervalued by your opponent so you could get away with an extra reap or two
Dr. Escotera: B-

- I’m going to say on average the playability gets you 1 aember. Even if you play this card for 0 it’s still a reasonable card.
Dysania: C

- It could be a B but I don’t recall too much archiving from anyone except Logos or Mars. Definitely strong against Logos and even stronger against Mars as most of the time their archived stuff are your better creatures.
Ganymede Archivist: C+/B-

- This card is Doc Bookton except you trade 2 power to archive a card instead of draw. To me, this is a sign that the developers feeling archiving is stronger than drawing. While I agree with that I think there is a threshold that 5 power creatures cross that gives the good doctor the edge over the archivist.
Harland Mindlock: C+

- The play effect is great but it’s such a fragile body with no defensive ability that I can’t see this as anything more than a tempo play.
Quixo the “Adventurer”: B

- All of this card’s stats synergies with each other. This is a must kill creature.
Mother: B

- Good sized body and good passive nothing to complain about with this creature.
Neutron Shark: B-

- At its worst, it will take out your opponent’s best permanent for itself. If you have a couple other creatures your willing to trade this will enable that. If you can, try to keep this around for the threat of activation. This is a big threat and should be dealt with quickly.
Novu Archaeologist: C+/B-

- Good sized body and a good action. If you have any good Logos actions in your discard you get to use it every turn if you want.
Ozmo, Martianologist: C//B

- This is the best house matters card so far. Heal 3 is a big enough to heal most to full and it’s on fight and reap. Elusive is great and if your up against a Mars deck they are going to have a tough time against this creature.
Psychic Bug: C+

- Looking at their hand is decent and will be stronger as a meta becomes established, but for now, it’s just bumping this creature from a C to C+
Replicator: C+
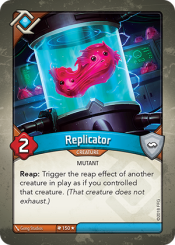
- Could sometimes be just a 2 power creature, but the rest of the time it’s a copy of the best creature on the board except smaller.
Research Smoko: C-

- Small body and really slow card advantage. Probably so non-threatening that your opponent will just let it sit on the board and reap for a couple of turns.
Skippy Timehog: C+

- Seriously hampers your opponent for a turn. It’s a better Foggify on a body instead of the aember.
Timetraveller: B/B+

- 2 cards and an aember with a body and you can do it all over again if your lucky and the game last long enough.
Titan Mechanic: C+

- It would be higher but the fact that your opponent gets to use the discounted key first is making me skeptical.
Vespilon Theorist: B-/B

- Sometimes you will just get lucky and this guy will reap for two and get you an extra card. The inconsistency also makes it a gamble for your opponent if it’s worth it to try and take this guy out via combat. I would definitely spend a removal action on this guy but is a lower priority than most elusive utility creatures.
Veylan Analyst: C-//B

- The best case for this card is in an artifact-heavy deck and ideally has most of them in Logos so you can get use out of it on the first turn. In this deck it becomes a must kill creature because it could generate free extra aember every turn. Outside of that deck, I think you’ll be lucky to make more than 1 aember off of it.
Experimental Therapy: D+

- As removal, it is only good for 2 turns and then you need to find a real removal card and as an upgrade, your opponent gets 2 turns to find removal and 2 for 1 you. I also find that most of the time I have been putting it on the guy I want to activate the most, but I would already be calling that house so there is no advantage gained.
Rocket Boots: C+

- This card is dependent on how good the creature you put it on is. Will probably upgrade the creature to a must kill threat so try to put on something with high power or elusive to maximize the resources your opponent will have to commit to removing your two cards.
Transposition Sandals: C

- It reminds me of Replicator. You’re trading the body and risk of upgrades for getting more versatility. I’m not too sure how powerful the switching spots is. I’m sure there are good uses but it feels very situational.
